Hosting a static website on S3 using AWS Cloudformation
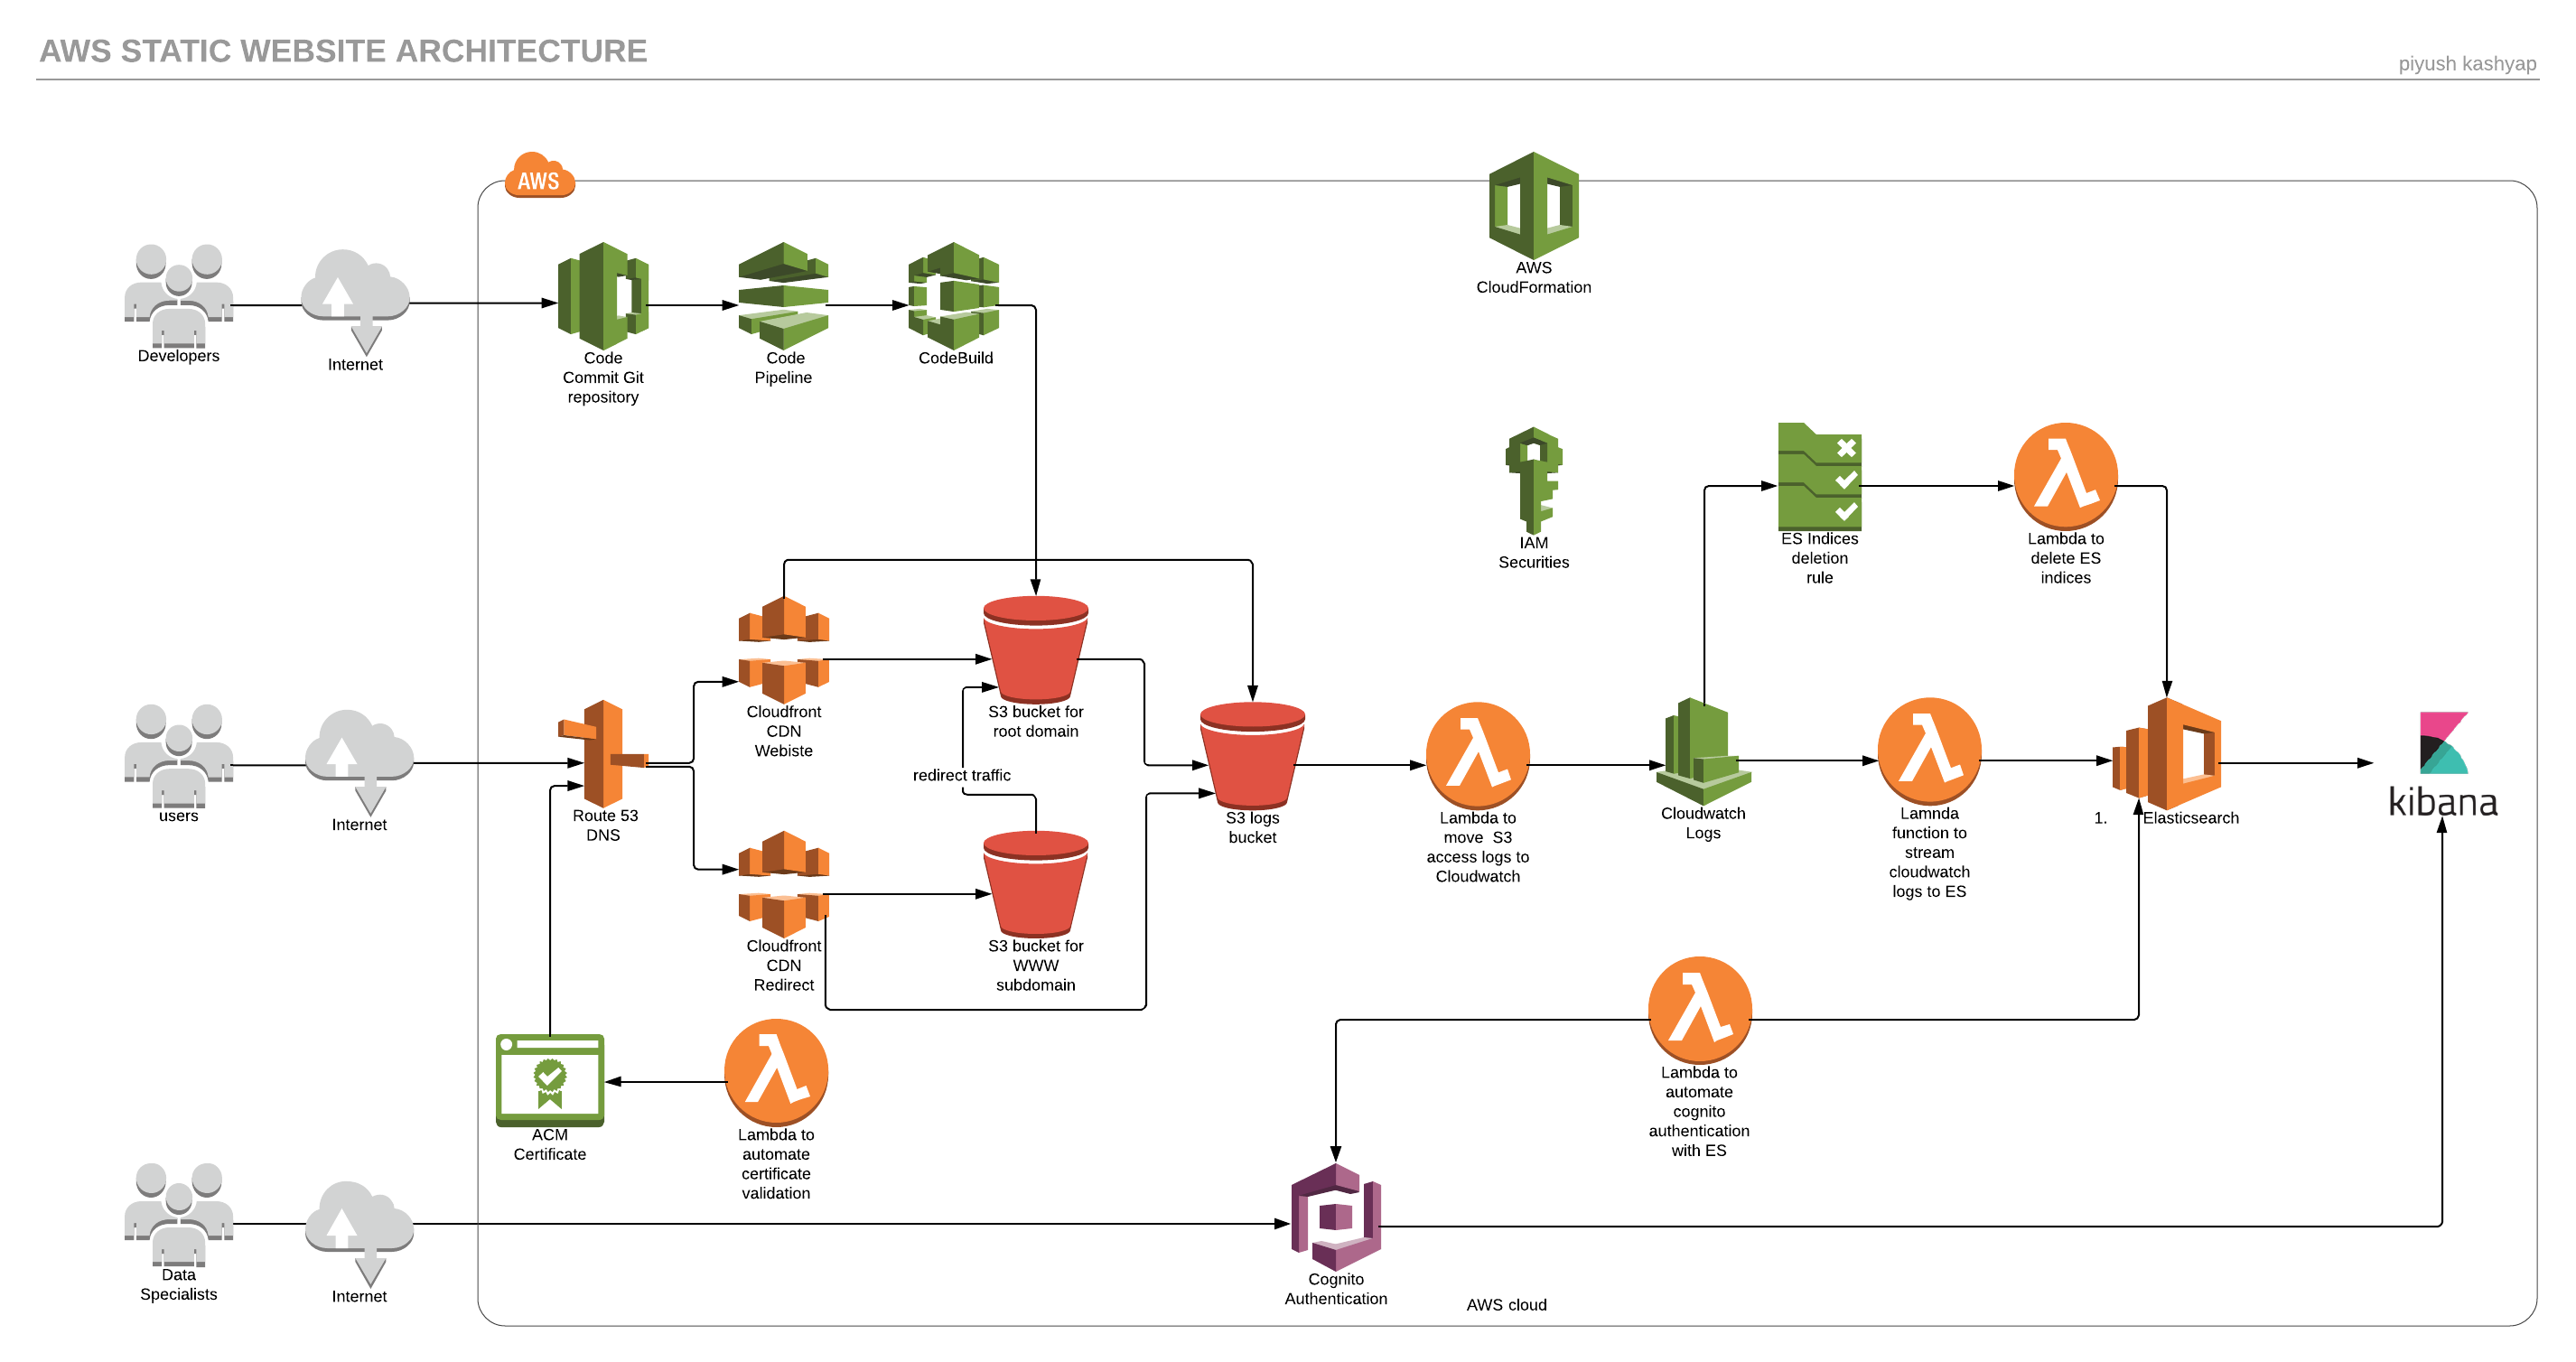
This post explains how to use AWS Cloudformation stack to automate infrastructure deployment to host a static website. The cloudformation stack also creates a CI/CD pipeline for automated deployment of code and it also setups a Elasticsearch service for S3 access logs analysis and visualization .
Static website using Cloudformation Git repo
Prerequisites
- Static website (html/css/javascript). (I prefer Hexo static site generator.)
- A registered domain name for website.
- Should have AWS CLI installed & configured and git setup for AWS CodeCommit on the local machine.
- Good knowledge of Amazon web services.
AWS services
- Route 53 - DNS service and domain registration for website
- Cloudfront - CDN, HTTPS
- S3 buckets - Website content, www redirect, access logs, CodePipeline artifacts, lambda zip files
- Lambda functions - S3 logs to cloudwatch, cloudwatch logs stream to elastisearch, certificate, delete elasticsearch indices
- Cloudwatch - Collects s3 access logs, trigger events
- Elasticsearch/Kibana - Logs analysis and visualization
- Cognito - Authentication for Kibana
- Certificate Manager - Free certificates
- IAM - Security, roles, permissions
- Cloudformation - Infrastructure Management
- Codecommit - Git repository
- Codepipeline - Orchestrates git and code build
- Codebuild - Code dependency installation
How to run
Step 1 - As the lamdba function in the main template uses a S3 bucket to store the code, Create a S3 bucket first using this template either from AWS console or by below AWS CLI command.
1 | aws cloudformation create-stack --stack-name {stackname} --template-body file://{path_to_template_file} |
Step 2 - Upload all the lambda zip code files to the bucket created in above step using following AWS CLI command.
1 | aws s3 cp {folder path}/ s3://{bucketname}/lambdas/ --recursive |
Step 3 - After that main stack can be created using this template. It might take around 40 to 50 minutes to create all the resources.
1 | aws cloudformation create-stack --stack-name {stackname} --template-body file://{path_to_template_file} --capabilities CAPABILITY_IAM --parameters ParameterKey=DomainName, ParameterValue={basedomain} ParameterKey=PreExistingHostedZoneDomain, ParameterValue={hosted zone} ParameterKey=PreExistingHostedZoneId, ParameterValue={hosted zone id} ParameterKey=ProjectName, ParameterValue={project name} |
Use following commands to track the stack events and output.
1 | aws cloudformation describe-stacks --stack-name {stackname} |
Step 4 - Once the stack is created, the output of stack will provide the site bucket name, Kibana url, CodeCommit url, Cognito user pool id.
- Use AWS Codecommit url to clone the repository.
- Create a new user profile in the user pool to access Kibana using following command.
1 | aws cognito-idp admin-create-user --user-pool-id {userpoolid} --username {username} --user-attributes Name=email_verified,Value=true,Name=email,Value={emailid} --region {region} --temporary-password {temp password} |
- Finally login into Kibana using the credentials created in the above step and configure the Kibana to use the Elasticsearch indices.
Important Notes
As soon as the code is pushed to AWS Codecommit, AWS Codepipeline is triggered by the push , then it uses AWS CodeBuild to build the code & finally AWS CodeBuild copies the files to S3 site bucket.
The template fully automates the provisioning of certificate including validation. It uses DNS validation method to validate the certificate. In order to use ACM Certificate with Cloudfront distribution, the certificate will be created in us-east-1 region only.
The template has been tested in us-east-1(North Virginia) and ap-south-1(Mumbai) regions. It should work in other regions as well.
Please leave your comments below or if you have any questions.